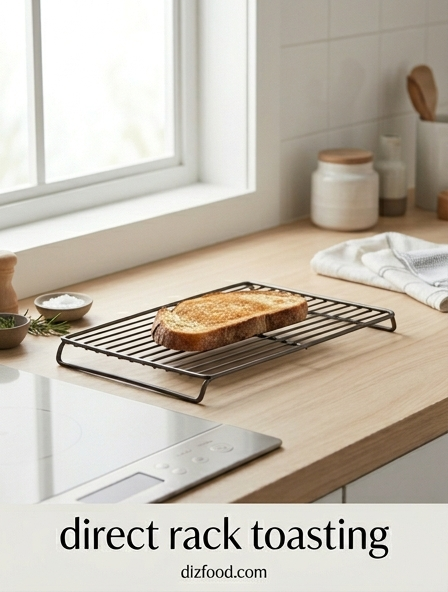
The Science of Direct Rack Airflow
Direct rack toasting leverages the principles of fluid dynamics to achieve a superior crunch. When bread is placed directly on the oven rack, it is enveloped by a continuous stream of heated air molecules. Unlike pan toasting, where the bottom surface is shielded, direct rack exposure allows for 360-degree convection. This unrestricted airflow facilitates the rapid evaporation of surface moisture, which is a prerequisite for the structural transformation of the bread's starch molecules. As the hot air moves through the wire gaps, it prevents the accumulation of localized humidity that often occurs in traditional toasters.
This process is highly efficient because it eliminates the thermal lag associated with heating a secondary vessel like a baking sheet. The kinetic energy of the air is transferred directly to the bread fibers, leading to a more uniform dehydration of the outer layers. Key benefits of this airflow include:
- Elimination of "soggy bottom" syndrome caused by trapped steam.
- Consistent heat distribution across the entire surface area.
- Increased rate of moisture migration from the core to the crust.
- Enhanced thermal efficiency by utilizing the oven's natural convection currents.
Optimal Oven Temperatures for Golden Crusts
Selecting the correct temperature is a balancing act between surface dehydration and internal moisture retention. If the oven is too cool, the bread undergoes a process called retrogradation, becoming tough and dry like a rusk. Conversely, excessively high temperatures will cause the sugars to carbonize before the interior has reached the desired temperature. For most artisanal and sandwich breads, a range between 375°F and 425°F (190°C to 220°C) provides the ideal environment for browning.
The following table outlines the expected results at various temperature settings when utilizing the direct rack method:
| Temperature | Resulting Texture | Color Profile |
|---|---|---|
| 325°F - 350°F | Dehydrated, Hard | Pale Blonde |
| 375°F - 400°F | Crisp Exterior, Soft Core | Golden Brown |
| 425°F - 450°F | Flash Toasted, Very Crunchy | Deep Umber |
It is important to preheat the oven thoroughly to ensure the radiant heat from the oven walls is stable before introducing the bread to the rack.
Maillard Reaction and Surface Browning Secrets
The Maillard reaction is the complex chemical dance between amino acids and reducing sugars that gives toast its distinctive flavor and aroma. This reaction typically begins to accelerate at temperatures above 285°F. Direct rack toasting is particularly effective at promoting this reaction because the wire grates act as localized points of high thermal conduction, while the spaces between them allow for the intense radiant heat to reach the bread surface unimpeded. This creates a variegated browning pattern that adds complexity to the flavor profile.
To maximize the Maillard reaction during rack toasting, consider the following chemical influencers:
- Sugar Content: Breads with honey or milk solids brown significantly faster.
- Surface pH: A slightly alkaline surface can accelerate the browning process.
- Protein Density: High-protein flours provide more amino acids for the reaction.
- Moisture Gradient: Removing surface moisture quickly allows the temperature to rise above the boiling point of water, triggering the reaction.
Understanding these variables allows for precise control over the depth of flavor achieved during the toasting cycle.
Choosing the Best Bread for Rack Toasting
Not every loaf is suited for the direct contact of a wire rack. The structural integrity of the bread determines whether it will sag between the wires or maintain its shape. High-hydration sourdoughs and dense rye breads are excellent candidates because their robust crumb structures can withstand the heat without losing volume. Conversely, very thin, highly processed white breads may curl or become overly brittle too quickly, making them difficult to handle without a supporting surface.
When selecting your bread, follow this hierarchy of suitability for the best results:
- Artisan Sourdough: Thick crust and irregular crumb allow for varied textures.
- Ciabatta: Large air pockets benefit from the high-velocity airflow.
- Whole Grain Loaves: The presence of seeds and bran adds a secondary crunch factor.
- Brioche: High fat content results in a rich, pastry-like toast, though it requires constant monitoring.
Always slice the bread to a thickness of at least half an inch to ensure that the interior remains tender while the exterior achieves a shattering crispness.
Positioning Your Oven Rack for Even Heat
The vertical placement of your oven rack significantly influences the ratio of radiant to convective heat. Ovens are typically hotter at the top due to rising heat, but the bottom often has the strongest radiant energy from the primary heating element. For direct rack toasting, the center position is generally the most reliable for achieving even browning on both the top and bottom of the slice. If the bread is placed too high, the top may burn before the bottom has developed a crust.
Consider these positioning strategies based on your specific oven type:
- Electric Ovens: Use the middle-upper rack to utilize the top element's radiant heat.
- Gas Ovens: Stick to the middle rack to avoid the intense, focused heat of the floor burner.
- Convection Ovens: Any position works, but avoid overcrowding to maintain air velocity.
- Toaster Ovens: Keep bread at least two inches away from elements to prevent scorching.
Rotating the bread 180 degrees halfway through the process can also compensate for any internal "hot spots" within the oven cavity.
Why Pans Block the Perfect Toast Crunch
Using a baking sheet is the most common mistake in oven toasting. A pan acts as a heat sink and a moisture trap. When bread is heated on a flat surface, the side in contact with the metal is subjected to conduction, while the side facing up is subjected to convection. This imbalance leads to uneven textures. More importantly, the pan prevents the moisture exiting the bottom of the bread from escaping, creating a micro-environment of steam that softens the bread fibers instead of crisping them.
The mechanical disadvantages of using a pan include:
- Thermal Barrier: The pan must be heated before it can heat the bread, increasing cooking time.
- Steam Accumulation: Moisture is forced back into the crumb, resulting in a rubbery texture.
- Reduced Surface Area: Only 50% of the bread is exposed to moving hot air at any given time.
- Uneven Color: The edges of the pan can block radiant heat from reaching the corners of the bread.
Direct rack toasting bypasses these issues by ensuring that moisture is carried away by the air the moment it leaves the bread.
Timing the Ultimate Crispy Bread Texture
Timing is the most volatile variable in direct rack toasting. Because the bread is exposed to intense, direct heat, the transition from "perfectly toasted" to "burnt" can happen in under sixty seconds. The total duration depends on the bread's moisture content, the starting temperature of the oven, and the thickness of the slice. Generally, a standard slice of sourdough at 400°F will take between five and eight minutes to reach peak crispness.
To master the timing, observe the following visual and physical cues:
- The Steam Trail: Toasting is nearly complete when visible steam stops rising from the oven vent.
- Color Gradient: Look for a deep amber color around the edges with a lighter gold in the center.
- The Sound Test: When tapped with a utensil, the bread should produce a high-pitched, hollow sound.
- Edge Curling: Slight upward curling of the crust indicates that the moisture has been sufficiently removed.
Always use a kitchen timer, but rely on your senses for the final assessment, as every loaf behaves differently.
Managing Crumb Fall and Oven Maintenance
One drawback of direct rack toasting is the inevitable accumulation of crumbs on the oven floor. If left unmanaged, these crumbs will smoke, char, and eventually ignite, creating a fire hazard and affecting the flavor of future meals. Maintaining a clean oven environment is essential for safety and for the purity of the toast's aroma. A single burnt crumb can fill the kitchen with acrid smoke that permeates the bread.
To manage debris effectively, implement the following maintenance routine:
- The Catch Tray: Place a clean baking sheet on the lowest possible rack, far below the bread, to catch falling debris without blocking airflow.
- Post-Toast Sweep: Once the oven has cooled, use a handheld vacuum or a damp cloth to remove any stray particles.
- Rack Cleaning: Periodically scrub the oven racks to remove carbonized oils that can transfer off-flavors to the bread.
- Avoid Fats: Do not butter the bread before placing it on the rack, as dripping grease can cause flare-ups.
Consistent maintenance ensures that your oven remains a high-performance toasting environment.
The Role of Radiant Heat in Sourdough
Sourdough bread possesses a unique cellular structure due to the long fermentation process, which creates large alveoli and a resilient gluten network. Direct rack toasting is particularly suited for sourdough because the radiant heat of the oven can penetrate these large air pockets more effectively than the conductive heat of a pan. The infrared energy from the oven elements targets the dense, hydrated starches of the sourdough, converting them into a glass-like crust while keeping the interior chewy.
The interaction between heat and sourdough components can be summarized as follows:
| Component | Effect of Radiant Heat |
|---|---|
| Lactic Acid | Volatilizes to produce a sharp, tangy aroma. |
| Gluten Network | Solidifies into a crisp, structural lattice. |
| Residual Sugars | Caramelize quickly for a distinct bittersweet flavor. |
| Starch Granules | Gelatinize then dehydrate, creating the "crunch." |
This method highlights the artisanal qualities of the bread, emphasizing the contrast between the rugged exterior and the airy crumb.
Advanced Techniques for Multi-Level Toasting
When preparing toast for a large group, utilizing multiple oven racks is necessary. However, this introduces challenges regarding heat distribution and airflow. The bread on the top rack will often toast faster due to rising heat, while the lower rack may be shielded from radiant heat by the bread above it. To achieve uniformity across multiple levels, it is vital to stagger the placement of the slices so that air can still circulate vertically through the oven cavity.
Follow these advanced steps for high-volume rack toasting:
- Staggered Loading: Place slices on the top rack in the gaps created by the slices on the bottom rack.
- Convection Engagement: If your oven has a fan, turn it on to equalize the temperature between the racks.
- The Mid-Cycle Swap: Move the bottom rack to the top and vice-versa halfway through the duration.
- Thermal Mass Adjustment: Increase the oven temperature by 15°F to compensate for the cooling effect of adding a large volume of cold bread.
These techniques allow for the production of dozens of perfectly toasted slices simultaneously, all maintaining the signature rack-toasted texture.


Comments