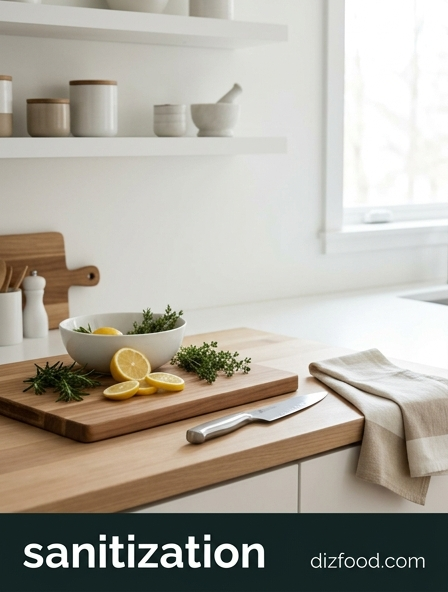
Ensuring your kitchen remains a safe space for meal preparation starts with mastering the art of deep cleaning your everyday essentials. From porous cutting boards to frequently used spatulas, achieving maximum sanitization for your daily kitchen tools is vital to preventing cross-contamination and the spread of harmful bacteria. By utilizing high temperatures and effective cleaning agents, you can transform your routine into a professional-grade hygiene practice that keeps your family healthy. Whether you prefer the control of a scrub brush or the convenience of technology, choosing the right method is key to long-term success. For a detailed comparison of these cleaning methods, explore the benefits of hand washing versus machine washing.
Optimal Water Temperatures for Effective Sanitization
In the culinary environment, water temperature serves as the primary line of defense against microbial proliferation. To achieve true sanitization rather than mere cleaning, the thermal energy must be sufficient to denature proteins in bacteria and viruses. For manual dishwashing, the water should ideally be maintained between 110°F and 120°F for the washing phase to effectively dissolve fats and grease. However, the final rinse requires significantly higher temperatures to act as a sanitizing agent.
| Process Type | Minimum Temperature | Objective |
|---|---|---|
| Manual Washing | 110°F (43°C) | Detergent activation and lipid breakdown |
| Manual Sanitizing Rinse | 171°F (77°C) | Thermal destruction of pathogens |
| Mechanical Dishwashing | 180°F (82°C) | Commercial grade sterilization |
If water temperatures fall below these thresholds, chemical sanitizers must be introduced to compensate for the lack of thermal energy. Consistent monitoring with a probe thermometer ensures that the water remains within the "kill zone" for common foodborne pathogens like Salmonella and E. coli.
Selecting the Best Antibacterial Cleaning Agents
The efficacy of a kitchen cleaning routine depends heavily on the chemical composition of the agents used. Unlike simple soaps, antibacterial agents are formulated with active ingredients designed to disrupt the cellular membranes of microorganisms. When selecting a product, it is vital to distinguish between cleaners, which remove dirt, and disinfectants, which kill germs. For a high-standard kitchen, professionals look for specific active components that offer broad-spectrum efficacy.
- Quaternary Ammonium: Ideal for food-contact surfaces as it is non-corrosive and odorless at proper dilutions.
- Sodium Hypochlorite (Bleach): A powerful, low-cost oxidant that is highly effective against viruses and spores.
- Hydrogen Peroxide: An eco-friendly alternative that breaks down into water and oxygen, leaving no toxic residue.
- Ethanol or Isopropanol: Best for rapid evaporation on non-porous surfaces, requiring a concentration of 60-70%.
Users must adhere strictly to the "dwell time" specified on the label. This is the duration the surface must remain wet with the agent to ensure maximum lethality. Skipping this step often results in incomplete sanitization, allowing resistant strains to survive and recolonize the workspace.
Hygiene Protocols for Sponges and Dishcloths
Sponges and dishcloths are notorious for being the most contaminated items in the kitchen due to their porous structure and constant moisture. These tools can harbor millions of bacteria per square inch if not managed with a rigorous hygiene protocol. Because they are used to wipe surfaces that come into contact with food, a contaminated sponge can easily spread pathogens across the entire kitchen. To mitigate this risk, a daily rotation and disinfection schedule must be implemented.
- Heat Treatment: Microwave damp sponges on high for two minutes daily to kill 99% of bacteria.
- Chemical Soaking: Submerge cloths in a solution of one tablespoon of bleach per gallon of water for five minutes.
- High-Heat Laundering: Wash dishcloths in a washing machine using the "sanitize" cycle and dry on high heat.
- Frequent Replacement: Discard sponges every two weeks, or immediately if they develop a persistent odor.
By treating these tools as potential vectors for disease, the risk of cross-contamination is significantly reduced. Always ensure sponges are wrung out and stored in a dry, ventilated holder between uses to prevent the growth of mold and mildew.
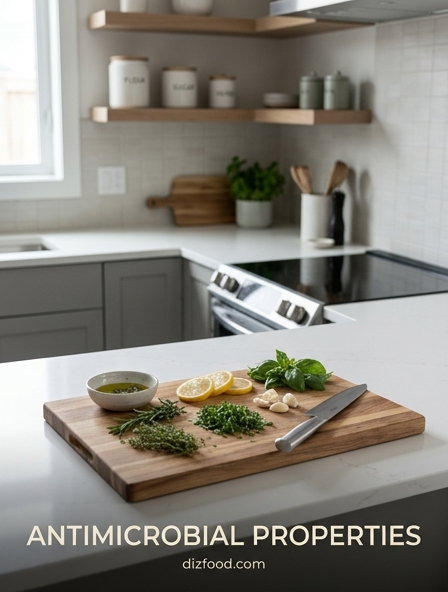
Deep Cleaning Techniques for Cutting Boards
Cutting boards, whether wood, plastic, or composite, require specific deep-cleaning techniques to address the micro-grooves created by knife blades. These grooves provide the perfect sanctuary for bacteria to hide and multiply, shielded from basic rinsing. A two-step process of cleaning followed by sanitizing is the industry standard for maintaining these essential tools. While plastic boards are often dishwasher safe, they can still degrade over time and require manual inspection for deep scarring.
- Scrubbing: Use a stiff brush with hot, soapy water to remove physical debris from all crevices.
- Sanitizing: Apply a solution of 15ml of unscented liquid chlorine bleach per gallon of water to the surface.
- Neutralizing: For wooden boards, use a mixture of baking soda and lemon juice to lift stains and neutralize odors.
- Resurfacing: Periodically sand down wooden boards to remove deep cuts where bacteria reside.
Crucially, never soak wooden boards as this leads to warping and cracking, which creates even more areas for bacterial colonization. After sanitizing, boards should be stood upright to ensure air circulation on all sides during the drying process, preventing moisture buildup on the underside.
Sanitizing High-Touch Surfaces and Handles
In a busy kitchen, high-touch surfaces such as refrigerator handles, oven knobs, microwave buttons, and faucet levers are frequently overlooked during routine cleaning. These areas act as transit hubs for germs, as they are touched multiple times during food preparation, often with contaminated hands. A comprehensive sanitization strategy must include a dedicated focus on these "hot spots" to break the chain of infection. Utilizing a systematic approach ensures no surface is missed during the daily turnover.
- Pre-clean: Wipe the surface with a microfiber cloth and warm soapy water to remove oils and fingerprints.
- Disinfect: Apply a food-safe disinfectant spray or a 70% alcohol-based wipe to the handle or knob.
- Dwell: Allow the sanitizer to sit for the recommended time (usually 30 to 60 seconds).
- Buff: Use a clean, dry cloth to remove any remaining residue and restore the finish.
Implementing a "clean-as-you-go" policy for these surfaces is especially critical when handling raw proteins. By sanitizing handles immediately after use, you prevent the transfer of pathogens to subsequent tasks or other kitchen users, maintaining a sterile environment throughout the cooking process.
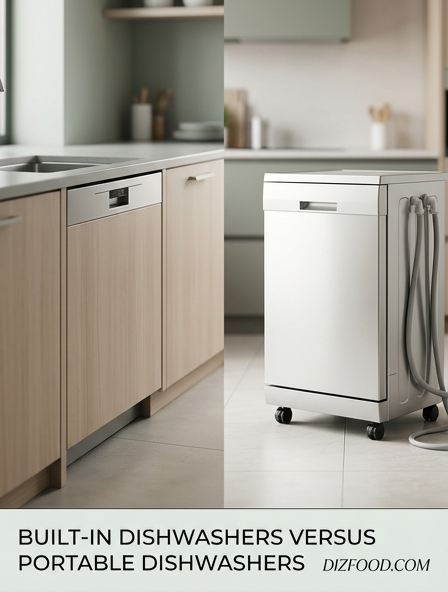
Optimizing Dishwasher Settings for Germ Elimination
Modern dishwashers are sophisticated machines capable of professional-level sanitization, provided they are used correctly. To ensure the total elimination of germs, users must move beyond the "normal" cycle and utilize the specific high-heat settings designed for hygiene. The "Sani-Cycle" is a specialized function found on many modern units that raises the internal water temperature to at least 150°F during the final rinse, which is the standard required for NSF/ANSI 184 certification. This temperature is sufficient to kill 99.999% of bacteria found on dishes.
- High-Temp Wash: Increases the temperature of the main wash to better dissolve stubborn proteins and fats.
- Heated Dry: Uses a heating element to evaporate moisture, preventing the damp conditions bacteria love.
- Filter Maintenance: Clean the dishwasher filter weekly to ensure food particles are not redistributed.
- Proper Loading: Avoid nesting spoons or overlapping plates to ensure water reaches every surface.
Without proper water flow and heat, the dishwasher merely moves debris around. Regularly checking the spray arms for blockages and using a rinse aid to prevent water spotting will also contribute to a more sanitary final product, ensuring dishes are both visually clean and microscopically safe.
Safe Drying Methods to Prevent Bacterial Growth
The process of drying is just as critical as the washing phase in a kitchen sanitization routine. Bacteria require moisture to survive and replicate; therefore, leaving dishes or surfaces damp creates an environment conducive to microbial growth. While many people instinctively reach for a tea towel, this is often the least sanitary option. Towels can quickly become damp and harbor bacteria from previous uses, essentially re-contaminating the clean dishes as they are wiped.
| Method | Pros | Cons |
|---|---|---|
| Air Drying | Most hygienic; no cross-contamination | Requires more space and time |
| Dishwasher Heat Dry | Very effective; high temperature | Uses more electricity |
| Single-use Paper Towels | Sanitary for spills and hands | High waste and ongoing cost |
The gold standard for drying in a professional or high-safety kitchen is air drying on a clean, slatted rack. This allows for maximum airflow around the entire object. If using a rack, ensure the rack itself is cleaned and sanitized weekly, as the drip tray can become a breeding ground for slime and mold if water is allowed to stagnate.
Disinfecting Complex Kitchen Gadgets and Tools
Kitchen gadgets with moving parts, such as blenders, meat grinders, and can openers, present unique sanitization challenges. These tools often have recessed areas, gaskets, and internal mechanisms where food particles can become trapped and rot. A surface-level wipe is insufficient for these items; they require a "strip-down" cleaning approach to ensure that every internal surface is reached by sanitizing agents. Failure to do so can lead to the accumulation of biofilms which are highly resistant to standard cleaning.
- Disassemble: Take apart all removable components, including blades, seals, and lids.
- Initial Soak: Submerge parts in hot, soapy water to loosen dried-on organic matter.
- Detail Scrub: Use a small bottle brush or toothpick to reach into gears and narrow channels.
- Sanitize and Dry: Dip components in a sanitizing solution and allow them to air dry completely before reassembly.
Particular attention should be paid to the rubber gaskets in blender bases and the cutting wheels of can openers. These specific areas are frequently found to harbor high levels of yeast and mold. Regular inspection of seals for cracks is also necessary, as damaged rubber can trap bacteria in ways that cleaning cannot fix.
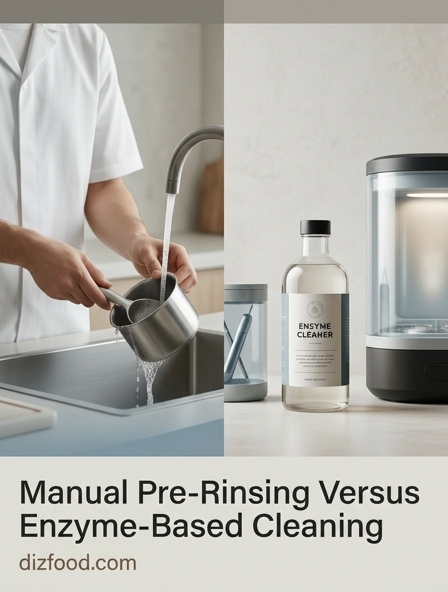
Natural Alternatives for Kitchen Tool Sanitization
For those looking to reduce their reliance on harsh industrial chemicals, several natural substances offer potent antimicrobial properties suitable for kitchen use. While natural alternatives may require slightly longer contact times than bleach-based products, they are highly effective for daily maintenance and are generally safer for families with small children or pets. These agents work through acidity or oxidative stress to neutralize common household germs without leaving behind toxic fumes or chemical residues.
- Distilled White Vinegar: The acetic acid content makes it an excellent descaler and a mild disinfectant for surfaces.
- Lemon Juice: High acidity levels help to break down grease and provide a fresh scent while inhibiting bacterial growth.
- Baking Soda: Acts as a mild abrasive to physically lift bacteria from surfaces and neutralize acidic odors.
- Hydrogen Peroxide (3%): A powerful oxidizer that can be sprayed on cutting boards to kill germs through bubbling action.
A highly effective natural sanitizing method involves the sequential use of vinegar and hydrogen peroxide. Research has shown that spraying a surface with one and then the other (in either order) is significantly more effective at killing pathogens than using either one alone. This "one-two punch" provides a powerful, non-toxic sanitization level comparable to commercial cleaners.
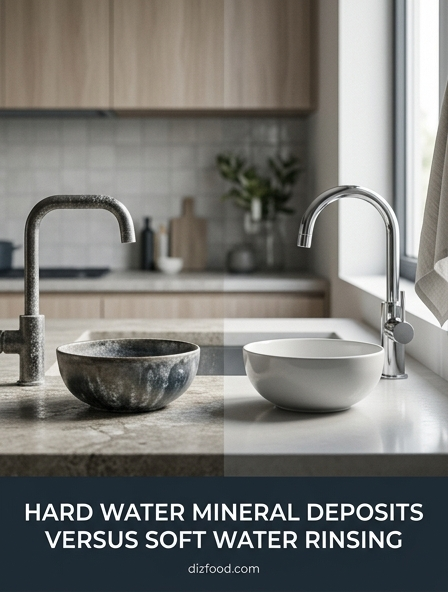
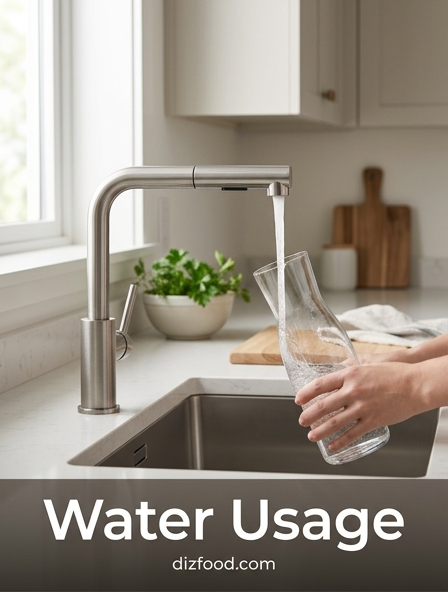
Cross-Contamination Prevention in the Sink Area
The kitchen sink is often the primary site for cross-contamination, acting as a crossroads for raw meats, dirty dishes, and fresh produce. Bacteria like Campylobacter and Salmonella can be aerosolized when water from the faucet hits a contaminated surface, spreading pathogens up to three feet away onto clean counters or drying dishes. Managing the "flow" of the sink area is essential for maintaining a safe kitchen. This involves treating the sink basin as a "hot zone" that must be managed with specific protocols.
- Avoid Rinsing Meat: Do not wash raw poultry or meat; this spreads bacteria through splashing water.
- Dedicated Zones: Use one side of a double sink for dirty items and the other for food preparation only.
- Post-Prep Sanitize: Immediately sanitize the basin and faucet after handling raw eggs or meat.
- Drain Maintenance: Pour boiling water or a baking soda/vinegar mix down the drain to prevent biofilm buildup.
By keeping the sink area organized and treating it as a high-risk zone, you prevent the invisible spread of germs. Never leave wet sponges or cloths in the bottom of the sink, and ensure that the surrounding backsplash is wiped down with a disinfectant daily to catch any micro-splashes that may have occurred during the day's tasks.

Comments