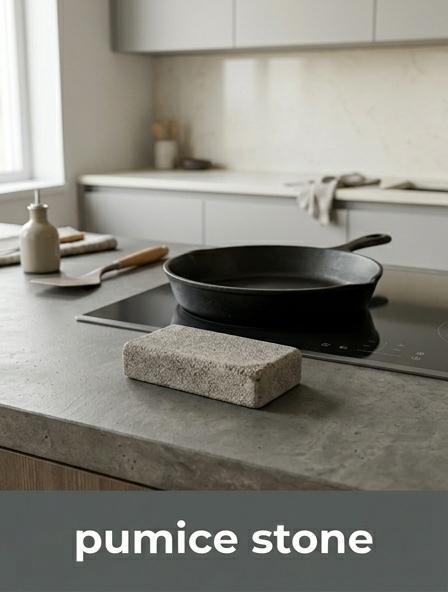
Identifying Surface Damage on Porcelain
Before initiating a restoration process with a pumice stone, it is essential to distinguish between superficial markings and structural compromises on kitchen porcelain. Surface damage often manifests as dull patches, grayish streaks, or tactile roughness caused by mineral accumulation. To accurately identify these issues, clean the sink thoroughly with a mild detergent and dry it completely. Inspect the basin under bright, angled lighting to reveal etching or fine "spider-web" cracking known as crazing.
A simple tactile test involves running a fingernail across the affected area; if the nail catches, the damage may be a deep scratch or a physical pit in the glaze. Conversely, if the mark feels slightly raised or textured, it is likely a metallic transfer or scale buildup that can be safely addressed with abrasive tools. Understanding the depth of the damage prevents unnecessary abrasion on healthy glaze. Distinguishing between a permanent crack in the ceramic body and a surface-level scuff ensures that the restoration effort is both effective and appropriate for the material's current state.
Removing Scratches and Metal Marks
Kitchen sinks frequently suffer from unsightly gray or black streaks caused by the transfer of metal from pots, pans, and cutlery onto the hard porcelain surface. These are not true scratches that have removed material, but rather deposits of softer metal. A pumice stone is an ideal tool for lifting these marks without the use of harsh industrial chemicals. It is imperative to keep both the stone and the porcelain surface wet throughout the process to create a lubricating slurry.
- Submerge the pumice stone in lukewarm water for at least one minute before use.
- Apply light, even pressure, moving the stone in small circular motions over the metal marks.
- Rinse the area frequently to check progress and ensure the glaze remains intact.
- Avoid using the stone on dry surfaces, as this can cause permanent scratching.
By following these steps, the abrasive volcanic glass in the pumice gently grinds away the metallic residue. This method effectively erases the appearance of "scratches" and restores the uniform white aesthetic of the basin, provided the user maintains constant moisture to protect the underlying vitreous coating.
Deep Cleaning Stained Ceramic Basins
Over time, porous ceramic surfaces in the kitchen can absorb pigments from coffee, tea, and organic food waste, resulting in persistent discoloration. When standard liquid cleaners fail to penetrate these deep-set stains, a wet pumice stone offers a mechanical solution for deep cleaning. The stone works by exfoliating the microscopic top layer of mineral buildup and debris where stains reside. This process is particularly effective for rings that form around the drain or the waterline where stagnant water allows pigments to settle.
When performing a deep clean, focus on the concentrated areas of discoloration. The abrasive nature of the pumice stone breaks down the bond between the stain and the ceramic surface. It is helpful to work in sections, applying a consistent motion to ensure an even finish. This mechanical action is often superior to bleaching agents, which may only lighten the stain rather than removing the physical particles trapped in the surface texture. Regular deep cleaning with this method prevents the accumulation of grime that leads to permanent yellowing of the kitchen ceramic.
Gentle Methods for Lime and Rust
Hard water deposits, such as lime and calcium, along with oxidized iron stains, commonly plague kitchen fixtures. These alkaline and metallic deposits create a crust that harbors bacteria and looks unappealing. A pumice stone serves as a physical disruptor for these stubborn minerals. Unlike acidic cleaners that can emit fumes, the stone provides a targeted, scent-free alternative for removing heavy buildup.
| Deposit Type | Appearance | Pumice Technique |
|---|---|---|
| Lime Scale | White, chalky crust | Firm pressure, wet stone |
| Rust Stains | Orange or brown streaks | Circular, focused strokes |
| Calcium Buildup | Hard, bumpy texture | Slow, rhythmic grinding |
Using the table above, users can tailor their approach to the specific mineral present. The key is to let the stone do the work; the friction between the volcanic glass and the mineral deposit shears the scale away from the porcelain. This method is especially useful for vertical surfaces where liquid descalers might run off before they can take effect.
Polishing Glazed Surfaces for Shine
Once stains and mineral deposits are removed, the goal shifts to restoring the reflective quality of the porcelain glaze. While a pumice stone is primarily an abrasive tool, using a heavily worn, soft-edged stone can help level out minor surface inconsistencies that diffuse light and make the sink look dull. This "micro-polishing" phase requires a very light touch and an abundance of water to ensure the friction is minimized while the leveling effect is maximized.
After the initial cleaning, the surface may appear clean but matte. By gently buffing the area with the paste created by the pumice-water slurry, you can smooth out the microscopic peaks and valleys on the porcelain. This process does not create a new glaze but rather refines the existing one to allow for better light reflection. Following this with a thorough rinse and a microfiber cloth dry will reveal the renewed luster. For the highest shine, this mechanical polishing should be the final step before applying any protective waxes or sealants specifically designed for kitchen ceramics.
Repairing Small Chips and Pits
Small chips and pits in a kitchen sink not only look poor but also serve as collection points for bacteria and food particles. While a pumice stone cannot fill a hole, it is an essential preparation tool for porcelain repair kits. If a chip has sharp, jagged edges, use a wet pumice stone to gently sand down the perimeter of the damaged area. This creates a smooth transition and removes any loose shards of glaze that might prevent a repair compound from adhering properly.
Smoothing the edges of a pit ensures that the filler material can be applied flush with the rest of the sink surface. Once the edges are prepped, the area should be cleaned of all dust and dried completely. After applying a porcelain touch-up glaze or epoxy, the pumice stone can again be used-very cautiously-once the material is fully cured to level any overfill. This careful integration of mechanical sanding and chemical filling results in a seamless repair that extends the life of the kitchen fixture and prevents the chip from expanding through further mechanical stress.
Eco-Friendly Restoration Solutions
In the modern kitchen, many homeowners seek to reduce their reliance on volatile organic compounds (VOCs) and corrosive acids. The pumice stone stands as a hallmark of eco-friendly restoration. Composed of natural volcanic rock, it is non-toxic, odorless, and chemically inert. It provides a powerful cleaning action without the risk of contaminating the home's greywater system or harming the skin of the user.
- Eliminates the need for disposable plastic bottles of chemical cleaners.
- Prevents the release of harsh bleach or phosphoric acid fumes into the kitchen air.
- Provides a long-lasting tool that biodegrades naturally over time as it wears down.
- Reduces the frequency of sink replacement, thereby lowering the environmental impact of manufacturing.
Choosing a pumice stone for kitchen maintenance aligns with a sustainable lifestyle. It relies on physical force and natural materials rather than complex synthetic formulas. This approach is particularly beneficial for households with pets, children, or individuals with respiratory sensitivities who cannot tolerate the pungent odors associated with traditional industrial-strength ceramic and porcelain cleaners.
Refinishing Aged Enamel Surfaces
Aged enamel sinks, often found in vintage or farmhouse kitchens, require a delicate balance of aggression and care. Over decades, the enamel can become etched and prone to holding onto grime. A pumice stone can be used to "strip" the surface of years of accumulated wax, oils, and minerals that standard scrubbing pads cannot touch. This process essentially resets the surface, preparing it for a fresh look or a professional refinishing coating.
When working with older enamel, the layer of glass may be thinner than on modern porcelain. It is vital to use a high-quality, fine-grit pumice stone and monitor the color of the slurry. If the slurry begins to take on the color of the underlying cast iron (usually black or dark grey), stop immediately, as this indicates the enamel has been fully breached. For most aged sinks, however, the pumice stone will simply remove the "fog" of age, revealing the original color underneath. This restoration can save a historical fixture from the landfill, preserving the character of the kitchen while improving hygiene.
Sealing and Protecting Hard Ceramics
After using a pumice stone to restore a ceramic surface, the porcelain is at its most clean but also its most vulnerable. The abrasive action, while effective, can leave the microscopic pores of the ceramic exposed. To maintain the results achieved during the restoration process, applying a specialized sealer or a protective coating is a necessary follow-up step. These products fill the microscopic abrasions and create a hydrophobic barrier that repels water and prevents oils from penetrating the surface.
The application of a sealer should only occur once the sink is perfectly clean and bone-dry. Most protectors are applied with a soft cloth and allowed to cure for several hours. This barrier makes future cleaning significantly easier, as lime scale and metal marks will sit on top of the sealer rather than bonding directly to the porcelain. By integrating a sealing routine after a pumice stone treatment, you ensure that the deep-cleaning results last for months rather than weeks, preserving the smooth, high-gloss finish of the kitchen ceramic against the rigors of daily culinary use.
Maintaining a Restored Kitchen Sink
Maintenance of a restored kitchen sink is focused on prevention and light, consistent care. Once the heavy lifting of restoration with a pumice stone is complete, the goal is to avoid the return of deep stains and heavy mineral buildup. Implementing a few simple habits can keep the porcelain in pristine condition without requiring frequent aggressive intervention.
- Rinse the sink with clear water after every use to remove acidic food residues.
- Dry the basin with a soft towel at the end of the day to prevent water spots and lime accumulation.
- Use rubber mats or plastic basins to prevent metal-to-porcelain contact from pots and pans.
- Perform a quick touch-up with a wet pumice stone at the first sign of a metal mark.
By addressing small marks as they appear, you prevent them from becoming "baked-in" or layered with mineral scale. This proactive approach ensures that the kitchen sink remains a focal point of cleanliness and beauty. Periodic light maintenance with a pumice stone takes only seconds and preserves the integrity of the glaze for years to come.


Comments